How Long Does Concrete Take to Dry? Complete Guide 2026
If you’re planning any kind of concrete work, whether it’s a driveway, patio, or even a small repair, one question always comes up:
What is the actual waiting time before I can start using it?
And honestly, this is where most people get it wrong.
You’ll hear things like “it dries in 24 hours” or “just wait a couple of days,” and while those statements aren’t completely false, they’re far from the full picture. Acting on that kind of advice is exactly why people end up with cracked surfaces, weak slabs, or repairs that don’t last.
The confusion usually comes from mixing up a few terms that sound similar but mean very different things: drying, setting, and curing. If you don’t understand the difference, it’s easy to make decisions too early and damage your project without even realizing it.
So instead of guessing, let’s break this down in a way that actually helps you know what to expect and, more importantly, what to do.
So, what’s the actual time it takes for concrete to dry?
The honest answer is: it depends on what you mean by “dry.”
In most cases, concrete will look dry and feel firm within 24 to 48 hours. At that point, you can usually walk on it without causing visible damage. That’s why many people assume it’s ready.
But here’s where things get misleading.
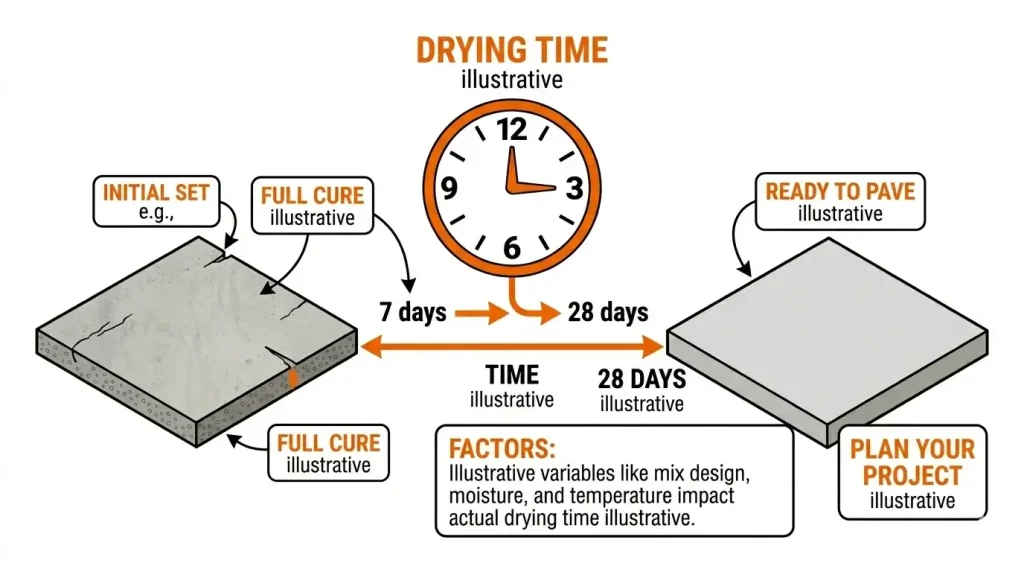
Even though the surface appears solid, the concrete underneath is still developing strength. In fact, it continues to harden and gain durability for up to 28 days.
This is why professionals never treat “surface dry” as “fully ready.” You might be able to walk on it after a day, but driving a car on it or putting a heavy weight on it too soon can lead to cracks that show up later.
A clearer way to understand it is this:
- 1–2 days → safe for light use
- Around 7 days → strong enough for moderate loads
- 28 days → fully cured and at maximum strength
Once you look at it this way, the timeline starts to make a lot more sense.
Why “drying” isn’t the whole story
One of the biggest misconceptions about concrete is that it simply “dries” like paint. That idea sounds logical, but it’s actually wrong.
Concrete doesn’t harden because it loses water. It hardens because of a chemical reaction happening inside it.
This is where the idea of curing comes in.
When water is mixed with cement, it triggers a process called hydration. This reaction forms bonds that gradually turn the mixture into a solid, durable material. And here’s the interesting part: this process needs moisture to continue.
So instead of wanting the concrete to dry out quickly, what you actually want is controlled moisture during the early days.
If the surface dries too fast:
- The reaction slows down
- The structure weakens
- Cracks can start forming
That’s why you’ll often see professionals keeping concrete slightly damp after pouring. It might seem counterintuitive, but it’s essential for strength.
Once you understand this, it becomes clear why “drying time” alone doesn’t tell the full story.
What’s actually happening after you pour concrete?
Right after concrete is poured, it goes through a few important stages, and each one matters.
In the first few hours, the mixture begins to lose its fluid consistency. This is known as the initial set. At this stage, it’s no longer workable, but it’s still very fragile.
By the next day or two, the surface becomes firm. This is when most people feel confident enough to walk on it, and in many cases, that’s fine for light use.
But beneath the surface, the real process is still ongoing.
Over the next several days, the internal structure continues to develop. In about a week, the concrete has gained a large portion of its strength. And by the time you reach the 28-day mark, it’s considered fully cured.
This gradual development is exactly why rushing things can cause problems. Just because something looks solid doesn’t mean it’s ready for heavy use.
Ready to Start Your Next Project?
Now that you know how long to wait before walking on your new slab, make sure your next project is perfectly estimated. Whether you are pouring a round column, a square slab, or footings, our free concrete calculator handles the math, rebar, and even the carbon footprint for you.
What controls how fast concrete dries and cures?
Now here’s where things get even more practical.
Concrete doesn’t follow the same timeline every time. The conditions around it can speed things up or slow them down, and sometimes in ways people don’t expect. That’s why two similar projects can have completely different drying experiences.
Let’s start with weather conditions, because this is often the biggest factor.
On a hot, dry day, concrete may appear to dry very quickly. At first, that might seem like a good thing. But in reality, rapid moisture loss can create problems. When water evaporates too fast, the surface can develop cracks, and the overall strength of the concrete may be reduced.
On the other hand, in colder weather, everything slows down. The chemical reaction responsible for hardening takes longer, which means the concrete needs more time before it’s ready to handle any kind of load.
Closely related to this is humidity.
In humid conditions, drying slows down because the air already holds a lot of moisture. Evaporation becomes less effective, which extends the drying time. In contrast, dry climates speed up evaporation, but as mentioned earlier, faster isn’t always better. It needs to be controlled.
Another factor people often overlook is slab thickness.
A thin layer of concrete will naturally dry and cure faster than a thick slab. There’s simply less internal moisture to work through. Thicker sections, however, take significantly more time not just on the surface, but deep inside where the curing process continues for days or even weeks.
Then comes the concrete mix itself, which plays a bigger role than most people realize.
If the mix contains too much water, it may take longer to dry and often results in weaker concrete. On the other hand, a properly balanced mix allows hydration to happen efficiently, leading to better strength and a more predictable curing process.
Finally, there’s airflow and ventilation.
Good airflow can help with surface drying, especially in enclosed spaces like garages or basements. But too much airflow, particularly in hot weather, can pull moisture out too quickly. And as you now know, that can do more harm than good.
How to speed up concrete drying before you even pour
If you’re on a tight timeline, the biggest mistake you can make is trying to “fix” drying time after the concrete is already poured.
The truth is, most of the control you have happens before the pour even begins.
A lot of delays come from poor planning, too much water in the mix, the wrong type of concrete, or a site that isn’t properly prepared. Once the concrete is down, your options become limited. So if speed matters, you need to think ahead.
One of the simplest ways to influence drying time is by controlling the water-to-cement ratio. It’s tempting to add extra water to make the mix easier to work with, but that convenience comes at a cost. More water means longer drying time and weaker concrete. A balanced mix, on the other hand, cures more efficiently and gains strength faster.
Choosing the right type of concrete also makes a noticeable difference. Not all mixes behave the same. Some are specifically designed to set faster, which can be a huge advantage for small projects or repairs where time is critical. Using a standard mix in those situations often leads to unnecessary waiting.
Preparation of the site is another detail that people underestimate. If the ground isn’t ready uneven, too wet, or poorly compacted, it can slow down the entire process. A well-prepared base allows the concrete to settle and cure evenly, which helps avoid delays later.
Then there are additives. In many cases, professionals use chemical admixtures to adjust how concrete behaves. Some additives are designed to speed up the setting process, especially in cooler weather, where curing naturally takes longer. Used correctly, they can save time without sacrificing strength.
When all of these factors are handled properly before the pour, you’re already ahead and the drying process becomes much more predictable.
How to speed up concrete drying after the pour
Once the concrete is poured, your goal shifts. You’re no longer trying to change the mix, you’re trying to create the right environment for it to cure efficiently.
One of the easiest ways to help is by improving airflow. Good air circulation helps moisture leave the surface at a steady rate, especially in enclosed areas. If you’re working indoors, even something as simple as opening windows or using fans can make a difference.
In more controlled environments, like basements or interior floors, dehumidifiers can be extremely effective. They pull excess moisture out of the air, which helps the surface dry more consistently without trapping dampness underneath.
You may also hear about curing compounds, and this is where things can seem a bit confusing. These are applied to the surface to slow down moisture loss, not speed it up. That might sound counterproductive, but it actually protects the concrete from drying too quickly, which is just as important as drying too slowly. The goal is balance, not speed at any cost.
Temperature control is another factor that often gets overlooked. Concrete performs best within a moderate temperature range. If it’s too cold, the curing process slows down. If it’s too hot, moisture evaporates too quickly, increasing the risk of cracking. Managing temperature, whether by shading the area, pouring at the right time of day, or using insulation in colder conditions, can significantly improve results.
The key takeaway here is simple: you don’t want to force concrete to dry faster; you want to help it cure properly under the right conditions. That’s what leads to strength and durability.
How do you actually know when concrete is dry?
This is where most people rely on guesswork and where mistakes usually happen.
Just because concrete looks dry doesn’t mean it is.
The surface might feel hard within a day, but internally, there’s still moisture and ongoing chemical activity. This difference between surface dryness and internal curing is critical.
A common rule of thumb is the “walking test.” After about 24 to 48 hours, concrete is usually strong enough to handle light foot traffic. If it doesn’t leave marks or feel soft under pressure, you’re generally safe to walk on it.
But walking and loading are two very different things.
If you’re thinking about placing heavy furniture or driving a vehicle over it, the timeline changes. For something like a driveway, waiting at least 7 days is a safer approach. Even then, the concrete hasn’t reached full strength; it’s just strong enough to handle moderate loads.
For full durability, you’re still looking at that 28-day curing period.
So instead of asking “Is it dry?”, a better question is:
Is it ready for the type of use I have in mind?
That shift in thinking helps you avoid damage that might not show up immediately but causes problems later.
Testing concrete for dryness (when you need to be sure)
In some cases, especially indoor flooring or professional projects you can’t rely on visual checks alone. You need more accurate ways to measure moisture.
One of the most common tools is a moisture meter. It gives you a quick reading of how much moisture is still present inside the concrete. This is particularly useful before installing flooring materials like wood or vinyl, where trapped moisture can cause serious issues.
There’s also a simple method known as the plastic sheet test. It’s not as precise, but it can give you a general idea. You place a plastic sheet over the concrete and seal the edges, then leave it for about 24 hours. If moisture collects underneath, the concrete is still releasing water.
For larger or more critical projects, professionals use advanced testing methods that measure internal humidity levels. These are more accurate and often required in commercial construction, where moisture control is essential.
The important thing is knowing when guesswork isn’t enough and using the right method for your situation.
Drying time for different types of concrete
By now, you’ve probably realized that not all concrete behaves the same. Different products and applications have their own timelines, and understanding these can save you a lot of confusion.
How long does it take for Quikrete to set?
If you’re working on a small project or a quick repair, chances are you’ve come across fast-setting products like Quikrete.
These mixes are specifically designed for speed. In most cases, Quikrete can begin setting in as little as 20 to 40 minutes, which is why it’s commonly used for:
- Fence posts
- Small patches
- Urgent repairs
However, this is where people often misunderstand things.
“Setting” doesn’t mean fully cured. It simply means the concrete has hardened enough to hold its shape. Even with fast-setting mixes, the concrete still needs time to gain strength.
So while it becomes firm very quickly, you should still allow additional time before putting it under stress or load.
| Concrete Grade | Initial Set Time | Walkable Time | Full Strength (Curing) |
|---|---|---|---|
| M5 | 24–48 hours | 48 hours | 28 days |
| M10 | 24–48 hours | 48–72 hours | 28 days |
| M15 | 24 hours | 48–72 hours | 28 days |
| M20 | 24 hours | 48 hours | 28 days |
| M25 | 24 hours | 24–48 hours | 28 days |
| M30 | 12–24 hours | 24–48 hours | 28 days |
| M35 | 12–24 hours | 24 hours | 28 days |
| M40+ | 12–24 hours | 24 hours | 28 days |
How long does cement take to cure?
When people ask this question, they’re usually referring to standard concrete made with cement.
The general timeline remains consistent across most traditional mixes:
- Initial hardening: 24 to 48 hours
- Usable strength: around 7 days
- Full cure: approximately 28 days
This 28-day period is considered the industry standard because that’s when concrete reaches most of its designed strength.
What’s important to understand here is that curing is a gradual process. The concrete continues to strengthen over time, even after it feels completely solid on the surface.
How long does self-leveling concrete take to dry?
Self-leveling concrete is a completely different category, and it’s often used for indoor flooring projects where a smooth, even surface is needed.
One of its biggest advantages is how quickly it becomes usable.
In many cases:
- It becomes walkable within 2 to 4 hours
- It can be ready for further flooring installation within 24 hours
That said, drying time still depends on factors like thickness and environmental conditions. A thicker application or a humid environment can extend the timeline slightly.
Even though it dries faster than traditional concrete, it’s still important not to rush the process, especially if you’re planning to install tiles, wood, or vinyl on top.
How long does floor leveling compound take to dry?
Floor leveling compounds are similar to self-leveling concrete, but their drying time can vary more depending on how they’re used.
In general:
- Thin layers can dry in as little as 4 to 6 hours
- Thicker applications may take up to 24 hours or more
The key factor here is thickness. The more material you apply, the longer it takes for moisture to escape and for the compound to stabilize.
If you’re working on an indoor project, it’s always a good idea to check the manufacturer’s guidelines, since different products can have slightly different drying times.
How long does a concrete driveway take to dry?
Driveways are one of the most common real-world applications, and this is where timing really matters because using it too soon can lead to costly damage.
Here’s a more realistic timeline:
- Walkable: after 24 to 48 hours
- Safe for vehicles: after about 7 days
- Fully cured: around 28 days
Many people make the mistake of driving on a new driveway too early, simply because it “looks ready.” But underneath the surface, the concrete is still gaining strength.
Waiting that extra time, especially in the first 7 days, can make a huge difference in preventing cracks and ensuring long-term durability.
At this point, everything comes together.
Concrete drying isn’t just about waiting it’s about understanding timing, conditions, and how the material behaves. Once you stop relying on rough guesses and start working with the process, you avoid the common mistakes that lead to cracks, weak surfaces, and unnecessary repairs.
And that’s really the difference between a project that simply “looks done” and one that actually lasts.